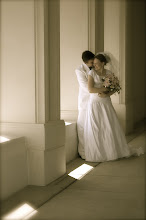
I love these guys - a lot. We got these done just before it got really cold.
Showing posts with label Work. Show all posts
Sunday, November 14, 2010
Friday, May 08, 2009
Week 3 Adjustment Layer/Smart Filter
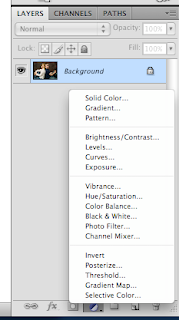
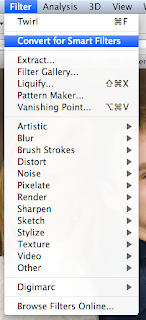
This week's editing assignment was to edit a photo using adjustment layers rather than just making the adjustments to the photo. I added a screen shot to show were to find the adjustment layers (left) Adjustment layers make it possible for you to go back in and re-do the adjustment (levels, etc.) if you decide you edited too much or not enough. Also we were supposed to practice using smart filters rather than regular filters - as the smart filters can be edited after they are placed on the photo. I added a screen shot (right) so you can find the smart filters. Click on the photos to enlarge.
Here is my original photo (on the left) and the edited with adjustment layers (on the right)
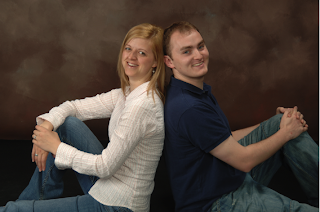
Camera info: Nikon D2X; Shutter Speed 1/160; F stop - 5.6; Date 4/15/09 (Photo taken in the photo studio on the third floor of the library. Used studio lights and the camera belongs to my employer Jeff Smith) In the photo are my sister-in-law, Jeanie and her fiance Jonny.

The first thing I did was to add a new layer and change it for smart filters (left) and then I added a mask (can be found next to the adjustment layers) and then I used the brush tool and black to make the people come through. The black paint works as an eraser, however, if you go to far you don't have to worry because you can use the white paint to bring things back that have been erased. By using these tools I brought out the subjects of the photo. This was probably the hardest part because I wanted them to look like they were in front of twirling background so I wanted to add a shadow. The way I did this was to use the black paint just a little off of their bodies at a very low opacity so the colors would appear very muted and make somewhat of a shadow. I think it worked very well.

To get the vignette on this photo I first saved my psd document with all the layers, in case I needed to change something, but then I also saved a copy that was flattened so everything would be on the same layer. Then I added a new layer and used the marquee tool to select the place I wanted to stay light, then I selected the inverse and filled it in with black. Then I reduced the opacity so the edge would be more feathered. Then I was finally done. I love how it turned out! (I added the gray border when I took the screen shot so you could see where the edges of the photo are - it is not a part of the design of this photo)

Here is my original photo (on the left) and the edited with adjustment layers (on the right)
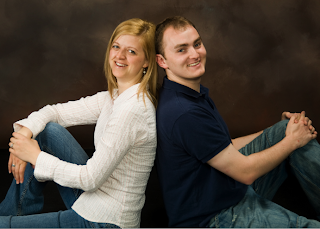
Camera info: Nikon D2X; Shutter Speed 1/160; F stop - 5.6; Date 4/15/09 (Photo taken in the photo studio on the third floor of the library. Used studio lights and the camera belongs to my employer Jeff Smith) In the photo are my sister-in-law, Jeanie and her fiance Jonny.
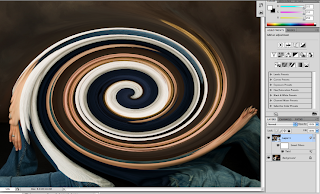
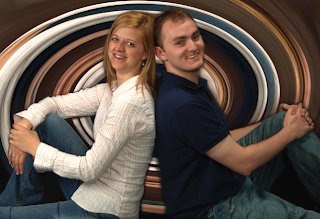
The first thing I did was to add a new layer and change it for smart filters (left) and then I added a mask (can be found next to the adjustment layers) and then I used the brush tool and black to make the people come through. The black paint works as an eraser, however, if you go to far you don't have to worry because you can use the white paint to bring things back that have been erased. By using these tools I brought out the subjects of the photo. This was probably the hardest part because I wanted them to look like they were in front of twirling background so I wanted to add a shadow. The way I did this was to use the black paint just a little off of their bodies at a very low opacity so the colors would appear very muted and make somewhat of a shadow. I think it worked very well.
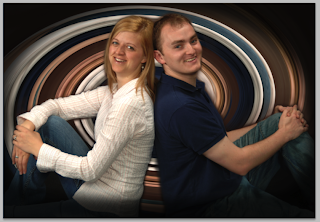
To get the vignette on this photo I first saved my psd document with all the layers, in case I needed to change something, but then I also saved a copy that was flattened so everything would be on the same layer. Then I added a new layer and used the marquee tool to select the place I wanted to stay light, then I selected the inverse and filled it in with black. Then I reduced the opacity so the edge would be more feathered. Then I was finally done. I love how it turned out! (I added the gray border when I took the screen shot so you could see where the edges of the photo are - it is not a part of the design of this photo)
Saturday, November 01, 2008
Halloween Concert
I origionally took photos of this concert for my work. They want me to take photos of the video guys as well as the lights and sound guys and other production stuff. Then my teacher mentioned the music department wanted photos. So we went twice. These are some of my favorite photos.


Sunday, October 12, 2008
Video Photos
I know that title sounds funny. Maybe I should say video guys photos...Or maybe I should call it work photos...or...I'm not sure. Can anyone think of a better title? Anyway, I work with the AV services on campus. Jennifer - I work in the office you used to work in at BYU I. Remember Robert? He remembers you. And Scot too. Anyway, the people I work with found out that I do photography and they asked me to take picture of the video guys to put up in their newly remodeled office. I got a cool shirt that says EVENTS PRODUCTION CREW or something like that and I can get into events for free and I take pictures. How cool is that? I don't even have to sit in a seat! Anyway, last night we went to see Natalie MacMaster who was amazing as well as all the people in her band. Because it's Mother's weekend here at BYU I my mom and Sam's mom went with us. Thanks to both of you for the sacrifices you made to be there. Also thanks to those of you who also sacrificed to let them come - aka all you moving people. I really appreciate the work of all those of you who helped make this a fun memorable night for all of us. Anyway, here are my top picks of the 514 photos I took in 2 hours last night. Which one is your favorite?
1
2
3
4
5
6
7
1
2
3
4
5
6
7
Subscribe to:
Posts (Atom)